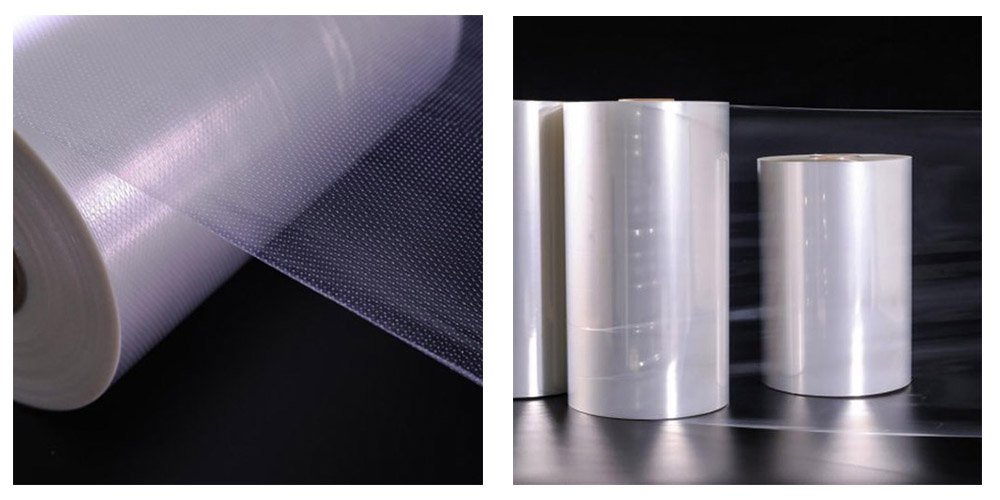
POF (Polyolefin) shrink film is a multi-layer co-extruded heat shrinkable film. The name comes from "Polyolefin", typically manufactured using 3-layer or 5-layer co-extrusion technology:
Outer layer: Copolymer polypropylene (PP) – provides excellent heat sealability and gloss
Middle layer: Linear low-density polyethylene (LLDPE) – delivers superior puncture resistance and tensile strength
This multi-layer structure gives POF film a range of outstanding properties:
| Property | Typical Value | Industry Advantage |
| Transparency | Haze 2.1%-4.5%, Gloss 81-88 | Clear product display, enhances shelf appeal |
| Shrinkage Rate | Cross: 60%-75%, Machine: 30%-65% | Tightly conforms to various product shapes |
| Tensile Strength | 100-130 N/mm² | Excellent tear and impact resistance |
| Heat Seal Strength | 0.75-1.55 N/mm | Suitable for high-speed automatic packaging |
| Cold Resistance | Maintains flexibility at -50°C | Ideal for cold chain logistics and frozen storage |
Main Types of POF Film & Application Scenarios
| Type | Features | Best For |
| Standard POF Film | High transparency, stable shrinkage, best value | Food, beverages, cosmetic boxes, electronics – general packaging |
| Low-Temperature Shrink POF Film | Shrinks at 100-130°C, protects heat-sensitive products | Chocolate, ice cream, candles, health supplements |
| Cross-linked POF Film | Significantly improved tear strength, highly durable | Irregular shaped products: toy figures, balls, crafts,Bath items |
| Anti-fog POF Film | Anti-fog additives prevent condensation | Fresh produce, meat, ready-to-eat meals – fresh food packaging |
| Hot Macro Perforated POF Film | Macro perforated allow air exchange | Eggs, bread requiring ventilation to extend shelf life |
| Special Note on Perforated (Breathable) Film: | Products like eggs and bread release moisture or gases during storage. Fully sealed packaging can lead to excess humidity, causing mold and spoilage. Perforated POF film features laser or mechanically punched micro-holes (0.3-1.0mm diameter), allowing water vapor and gas exchange while maintaining dust protection and moderate moisture resistance. This can extend product shelf life by 30%-50%. | |
Product Specification Selection Guide
POF film thickness, width, and length must match product characteristics and packaging equipment:
| Selection Parameter | Light/Small Products | Medium Weight Products | Heavy/Sharp Edge Products |
| Thickness | 12-15mic | 19-25mic | 25-30mic or Cross Linked |
| Examples | Stationery, small boxes, cards | Food boxes, cosmetics, beverages | Hardware tools, heavy parts |
| Width Calculation: Film width should be 1.3-1.5 product perimeter for adequate wrapping. | |||
Packaging Machine Types & Film Matching Guide
Different packaging equipment requires compatible POF film types for optimal results.
| Film to Machine Matching Table | |||
| Film Type | Film Format | Compatible Machine | Typical Applications |
| CF Film | Center-folded film | L-Type Sealer(semi-auto or fully automatic) | Regular-shaped products requiring 4-side sealing: cartons, trays, books, CD cases |
| SW Film | Single-layer (two rolls) | Flow Pack | Long-shaped or multi-piece bundle packaging: toilet paper, noodles, multi-snack packs |
Optimal Process Parameter Settings
The quality of POF film shrinkage depends on the precise matching of temperature, speed, and air volume.
Temperature Settings
| Parameter | Recommended Range | Notes |
| Standard POF shrink temperature | 130°C – 180°C | Adjust based on film thickness and equipment |
| Low-temperature POF shrink temperature | 100°C – 130°C | For heat-sensitive products |
| Sealing temperature (L-Type sealer) | 120°C – 150°C | Depends on film thickness & sealing speed |
| Sealing temperature (Flow Pack) | 130°C – 160°C | Increase slightly for high-speed operation |
Speed Matching Principle
Longer shrink tunnel allows faster conveyor speed
Higher temperature requires faster speed to prevent overheating damage
Recommended method: Start at lower temperature (e.g., 130℃), gradually increase temperature or decrease speed until ideal shrinkage is achieved
Hot Air Circulation Settings
Proper air speed and distribution ensure uniform heating across all product areas
For complex shaped products, consider zone temperature control: slightly higher top temperature than bottom
Common Shrink Wrapping Problems & Solutions
Problem 1: Uneven Film Shrinkage
| Aspect | Details |
| Symptoms | Some areas tightly shrunk, others loose or wrinkled; inconsistent shrinkage on same product; ends over-shrunk while middle under-shrunk |
| Possible Causes | ① Improper shrink tunnel temperature (too high or low) |
| ② Uneven hot air circulation, blocked vents or fan failure | |
| ③ Conveyor speed too fast, insufficient heating time | |
| ④ Non-uniform film thickness or incorrect film width | |
| ⑤ Product misaligned in tunnel, uneven heating | |
| Solutions | ① Recalibrate shrink tunnel temperature |
| ② Clean hot air circulation system, ensure clear air paths | |
| ③ Reduce conveyor speed appropriately | |
| ④ Check film specifications, adjust width to 1.3-1.5× product perimeter | |
| ⑤ Ensure product passes through center of conveyor belt | |
| Adjustment Steps | Step 1: Check zone temperature display, confirm within recommended range (130-180°C) |
| Step 2: Clean air intake and exhaust vents, check fan operation | |
| Step 3: Reduce conveyor speed by 10-20%, observe effect | |
| Step 4: If issue persists, gradually increase temperature (5°C increments) until uniform | |
| Step 5: Record successful temperature/speed combination as standard parameter |
Problem 2: Weak / Poor Sealing
| Aspect | Details |
| Symptoms | Seal line easily tears open; package opens spontaneously; seal fails during transport |
| Possible Causes | ① Seal temperature too low or too high |
| ② Insufficient or uneven seal pressure | |
| ③ Seal time too short, insufficient heat transfer | |
| ④ Contaminated film surface (dust, oil, moisture) | |
| ⑤ Aged silicone pad or damaged Teflon coating | |
| Solutions | ① Adjust seal temperature to optimal range (120-150°C) |
| ② Increase cylinder pressure or balance pressure distribution | |
| ③ Extend seal time or reduce sealing speed | |
| ④ Clean film surface, improve storage conditions | |
| ⑤ Replace aged silicone pad or damaged Teflon cloth | |
| Adjustment Steps | Step 1: Calibrate actual seal temperature vs. set value using infrared thermometer |
| Step 2: Check seal bar and silicone pad flatness (<0.2mm deviation) | |
| Step 3: Gradually adjust seal temperature (5°C increments), test seal strength | |
| Step 4: Check cylinder pressure, ensure uniform on both sides | |
| Step 5: Observe seal line appearance: white = too low, yellow/black = too high | |
| Step 6: Record optimal seal temperature parameters |
Problem 3: Unattractive Shrinkage
| Aspect | Details |
| Symptoms | Wrinkles or orange peel effect on film surface; whitening / loss of transparency; loose corners; poor visual appearance |
| Possible Causes | ① Mismatched shrink temperature |
| ② Uneven hot air distribution, local overheating or cooling | |
| ③ Film stored too long or moisture absorption | |
| ④ Incorrect film width (too wide or narrow) | |
| ⑤ Complex product shape causing uneven shrinkage stress | |
| Solutions | ① Adjust to optimal shrink temperature based on film type |
| ② Check hot air circulation, adjust top/bottom air volume ratio | |
| ③ Control storage environment (temp <30°C, humidity <70%) | |
| ④ Recalculate film width (perimeter × 1.3-1.5) | |
| ⑤ Reduce conveyor speed or use specialty film for complex shapes | |
| Adjustment Steps | Step 1: Confirm POF film type (Standard/Low-Temp/High-Performance) |
| Step 2: Start at lower recommended temperature, gradually increase | |
| Step 3: Check and adjust top/bottom air volume for uniform heating | |
| Step 4: Test with fresh film batch to rule out moisture | |
| Step 5: Test different film widths to find best match | |
| Step 6: Record ideal temperature, speed, and air volume combination |
Problem 4: Film Jamming / Poor Unwinding
| Aspect | Details |
| Symptoms | Film cannot feed smoothly; film jams at guide rollers or sealing bar; frequent machine alarms; roll does not turn freely |
| Possible Causes | ① Sticky or rough guide roller bearings |
| ② Film tension too high or too low | |
| ③ Uneven or damaged roll edges | |
| ④ Static causing film to stick to rollers | |
| ⑤ Roll improperly mounted, axis not horizontal | |
| Solutions | ① Clean and lubricate guide rollers, check bearings |
| ② Adjust tension to appropriate range (stretch rate ≤5%) | |
| ③ Replace roll with clean, even edges | |
| ④ Install static eliminator or increase humidity | |
| ⑤ Remount roll ensuring horizontal axis alignment | |
| Adjustment Steps | Step 1: Stop machine, check all guide rollers rotate freely, clean residue |
| Step 2: Check roll edges for damage, replace if necessary | |
| Step 3: Gradually reduce film tension, observe feeding smoothness | |
| Step 4: Install static elimination brush or adjust humidity to 50-60% | |
| Step 5: Remount roll aligned with machine centerline | |
| Step 6: Test at low speed, confirm normal before resuming production |
Problem 5: Air Bubbles / Blistering After Shrinkage
| Aspect | Details |
| Symptoms | Air trapped between film and product, forming raised bubbles; bubbles concentrated at corners or recessed areas |
| Possible Causes | ① No vent holes in fully sealed packaging |
| ② Poor product positioning before sealing, excessive trapped air | |
| ③ Perforation device clogged or not installed | |
| ④ Shrink temperature rises too quickly, air cannot escape | |
| Solutions | ① Pre-set vent holes in film (perforation) |
| ② Adjust product positioning for tighter film wrap | |
| ③ Clean or replace perforation needle roller | |
| ④ Use step-wise shrink process: preheat → hold → cool | |
| Adjustment Steps | Step 1: Check perforation device operation, clear clogged needles |
| Step 2: Apply uniform vent holes (0.5-1mm dia, 10-15 holes/100cm²) | |
| Step 3: Adjust pre-seal product position for tighter wrap | |
| Step 4: If using continuous shrink tunnel, reduce conveyor speed | |
| Step 5: Observe bubble disappearance, adjust hole density as needed |
Problem 6: Film Perforation or Melting
| Aspect | Details |
| Symptoms | Holes in film after shrinkage; localized thinning or melting; product exposed |
| Possible Causes | ① Shrink temperature too high or conveyor speed too slow |
| ② Tunnel too small, film touches hot tunnel walls | |
| ③ Film thickness too thin for application | |
| ④ Sharp product edges puncture film | |
| Solutions | ① Immediately reduce temperature or increase speed |
| ② Ensure minimum 5-10cm clearance between product and tunnel walls | |
| ③ Upgrade to thicker POF film (25-30μm) | |
| ④ Chamfer sharp edges or add protective padding | |
| Adjustment Steps | Step 1: Stop machine, inspect hole location and pattern |
| Step 2: Reduce shrink temperature by 20°C while increasing speed by 20% | |
| Step 3: Measure product-to-wall clearance, adjust guides if <5cm | |
| Step 4: If issue persists, test with thicker film | |
| Step 5: Verify thermocouple function, actual temp matches display | |
| Step 6: Record safe maximum temperature as alert value |
Problem 7: Film Sticking to Seal Bar
| Aspect | Details |
| Symptoms | Film sticks to seal bar after cutting; package lifts with bar; stringing at seal |
| Possible Causes | ① Seal temperature too high, film melts and sticks |
| ② Teflon coating damaged or missing | |
| ③ Dirty seal bar surface with residue | |
| ④ Excessive seal pressure or hold time | |
| Solutions | ① Reduce seal temperature appropriately |
| ② Replace with new Teflon cloth | |
| ③ Clean seal bar surface, remove burnt residue | |
| ④ Reduce seal pressure or shorten hold time | |
| Adjustment Steps | Step 1: After cooling, inspect Teflon cloth condition |
| Step 2: Clean bar residue with brass brush or specialist cleaner | |
| Step 3: Reduce seal temperature by 5-10°C for testing | |
| Step 4: Adjust seal pressure to minimum required for good seal | |
| Step 5: If still sticking, replace Teflon cloth entirely |
Problem 8: Product Tilting / Shifting After Packaging
| Aspect | Details |
| Symptoms | Product crooked inside package; originally aligned products become disorganized |
| Possible Causes | ① Conveyor vibration or uneven belt joint |
| ② Unstable product positioning before sealing | |
| ③ Uneven shrinkage forces across product | |
| ④ Conveyor speed out of sync with sealing speed | |
| Solutions | ① Check conveyor belt joint flatness (<1mm deviation) |
| ② Add product guides or positioning fixtures | |
| ③ Adjust top/bottom air volume ratio for balanced forces | |
| ④ Synchronize conveyor and sealing speeds | |
| Adjustment Steps | Step 1: Check belt joint for steps or bumps, repair if necessary |
| Step 2: Add guide rails before sealing zone to restrict product position | |
| Step 3: Adjust top/bottom air volume ratio (start at 1:1) | |
| Step 4: Reduce conveyor speed, observe product stability | |
| Step 5: After adjustments, run 10 consecutive products to verify |
5. Quick Diagnosis Reference Table
| Problem Symptom | Problem # | Primary Adjustment Parameters |
| Uneven shrinkage | Problem 1 | Temperature + Speed |
| Weak sealing | Problem 2 | Seal temperature + Pressure |
| Unattractive shrinkage (wrinkles/whitening) | Problem 3 | Temperature + Air volume |
| Film jamming / poor feed | Problem 4 | Tension + Roller cleaning |
| Air bubbles / blistering | Problem 5 | Perforation density |
| Film perforation / melting | Problem 6 | Reduce temp + Increase speed |
| Film sticking to seal bar | Problem 7 | Reduce seal temperature |
| Product tilting / shifting | Problem 8 | Guides + Air volume balance |
Appendix: Quick Film Selection Reference Card
| Product Type | Recommended Film | Recommended Machine |
| Regular boxed products (cosmetics, medicine, electronics) | CF Film (center-folded) | L-Type Sealer |
| Long/cylindrical products (toilet paper, noodles, multi-drinks) | SW Film (single layer) | Flow Pack / Pillow Wrapper |
| Eggs, bread, baked goods | Perforated (Breathable) POF Film | L-Type or Flow Pack (depending on shape) |
| Fresh produce, meat | Anti-fog POF Film | CF or SW based on machine |
| Heat-sensitive products (chocolate, ice cream) | Low-Temperature Shrink POF Film | CF or SW based on machine |
| Irregular shaped products (toys, crafts) | Cross-linked POF Film | CF or SW based on machine |
Contact Us
For more information about POF shrink film applications, or if you need on-site support for machine commissioning, please contact us. We look forward to being your trusted packaging solution partner.
A Professional Manufacturer Specializing in POF Shrink Films and Flexible Packaging Solutions


No.216 1446 Wutai Mountain Road,Huang District,Qingdao,China
COPYRIGHT © 2026 UMI PACKING CO.,LTD.
 Powered By HiCheng

 Español